Appearance
View & Manage Ticket Entries
The Tickets section is the central hub for viewing and managing all customer inquiries within Fluent Support. This dashboard provides a comprehensive view of your support operations, customer information, and specific user summaries in one place.
Accessing Tickets
To view your tickets, navigate to your Fluent Support Dashboard and click on Tickets in the top navigation menu.
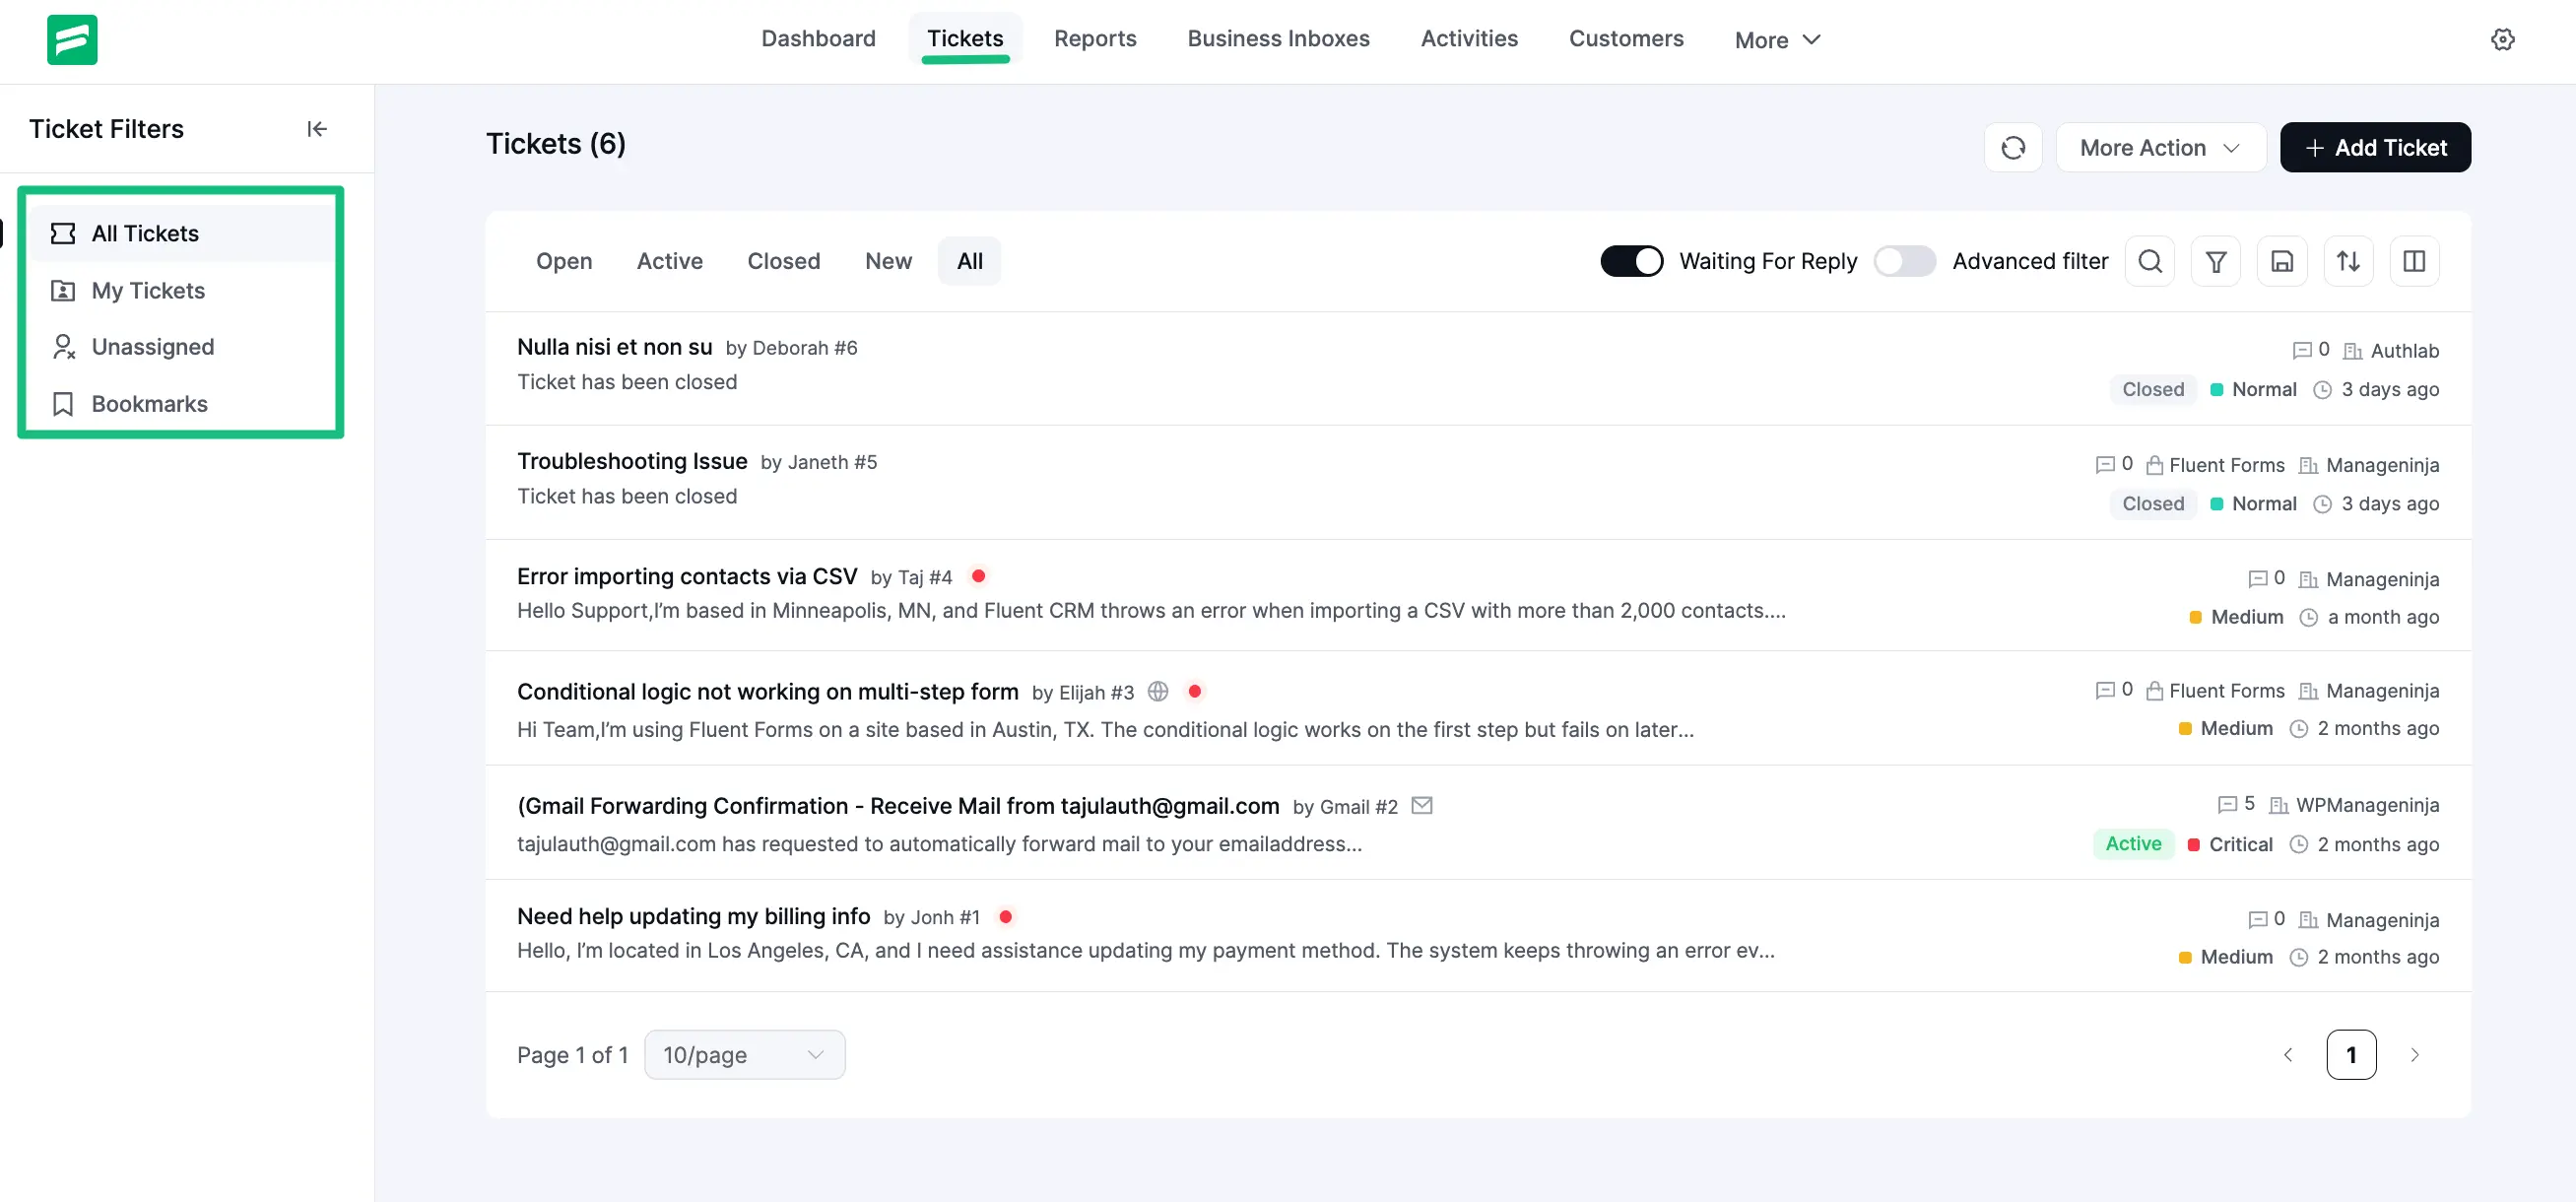
Ticket Filtering Sections
Once in the Tickets area, you will find four primary sections in the left sidebar to help organize your workflow:
- All Tickets: Displays every ticket submitted to the system.
- My Tickets: Shows only the tickets specifically assigned to you (the active agent).
- Unassigned: Contains tickets that have not yet been assigned to a support agent.
- Bookmarks: Stores tickets you have specifically marked for easy access.
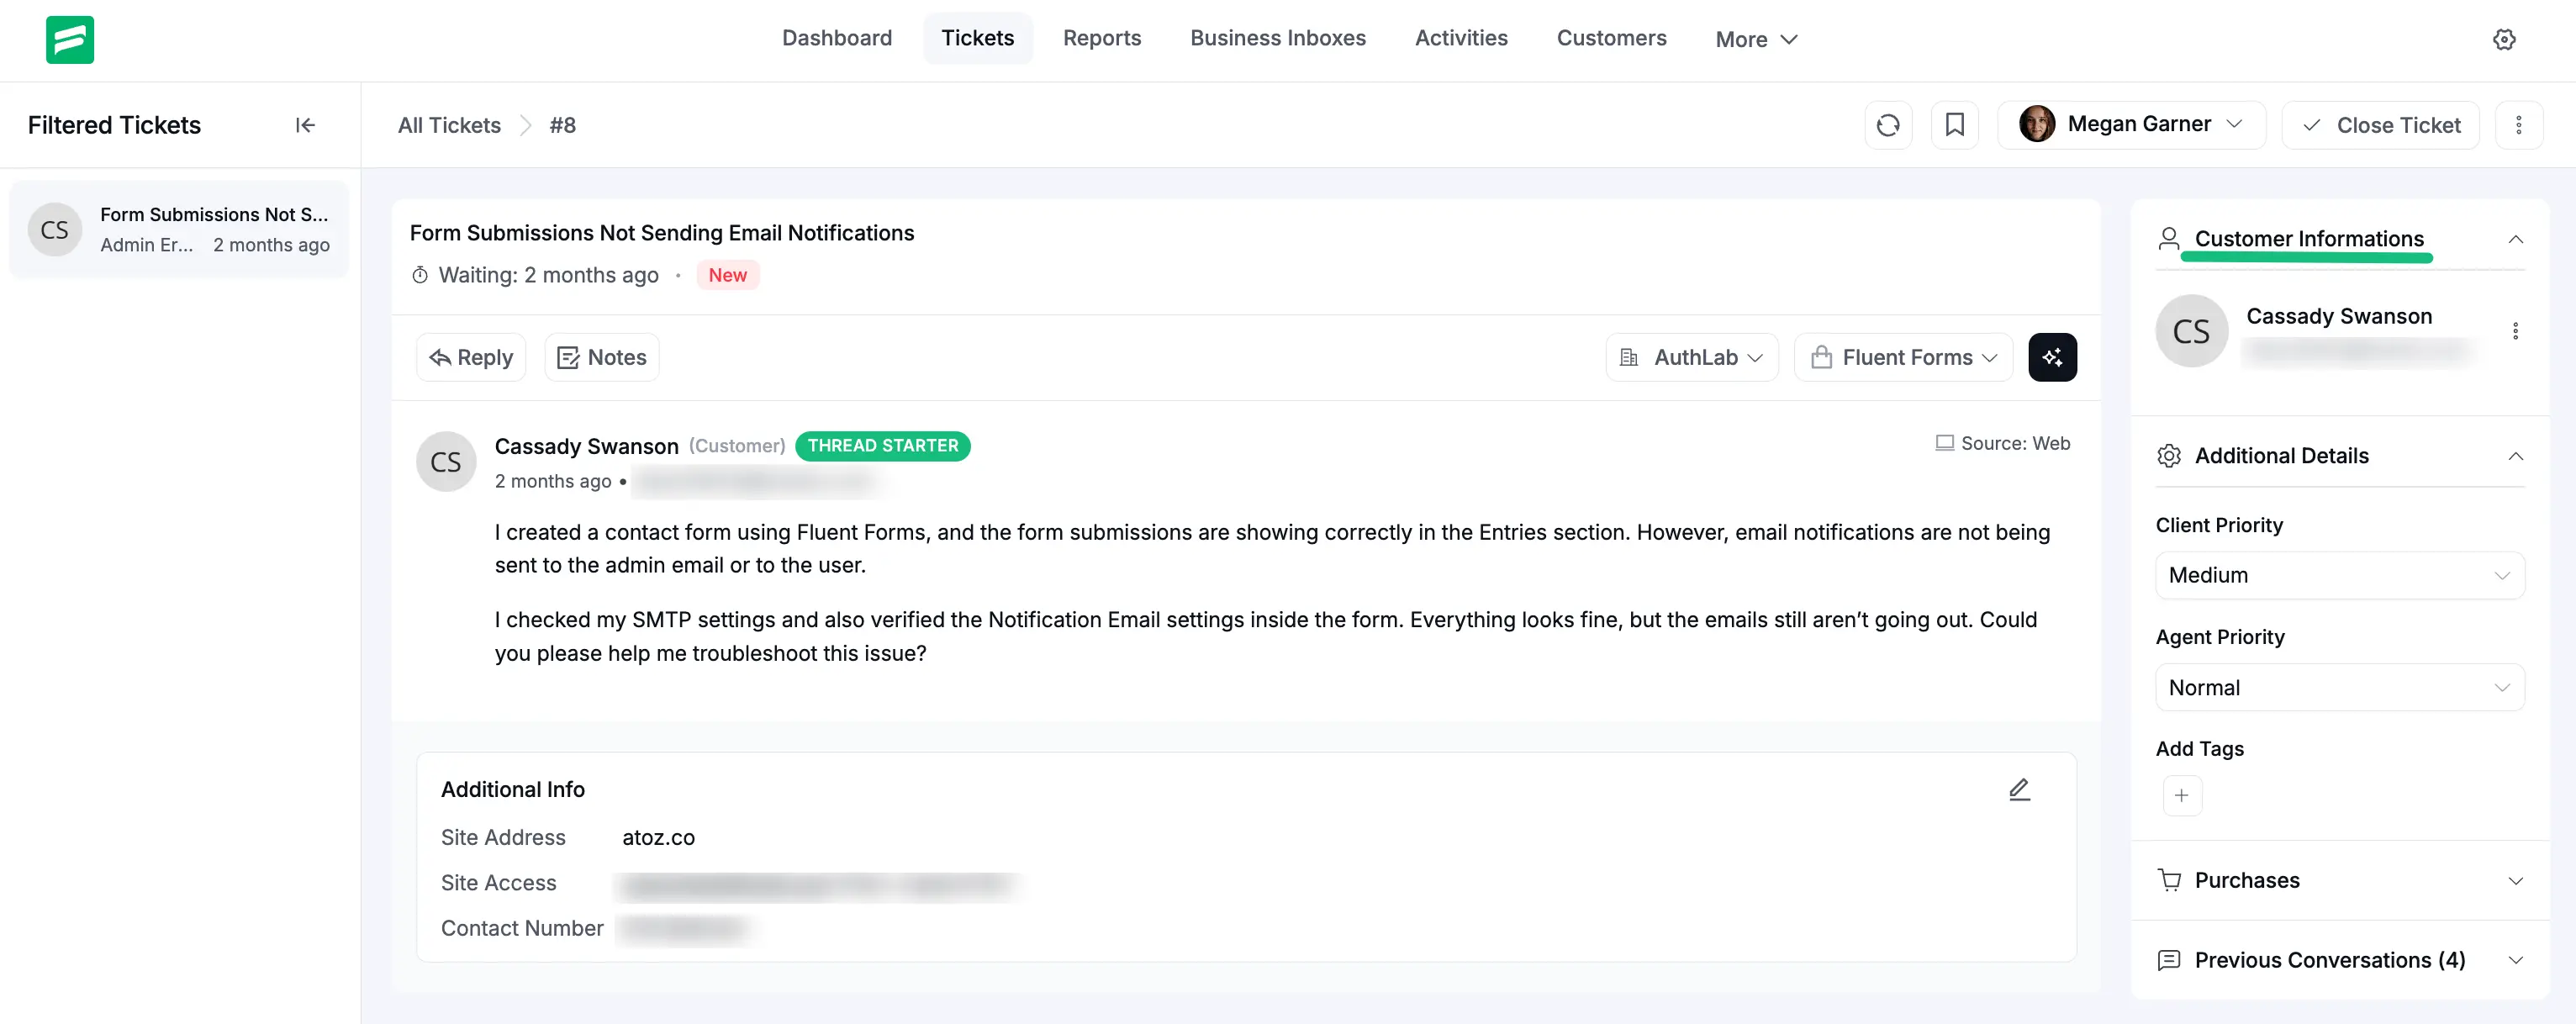
Individual Ticket Management
Clicking on any ticket from the list opens the individual ticket page, where you can respond to customers and manage ticket metadata.
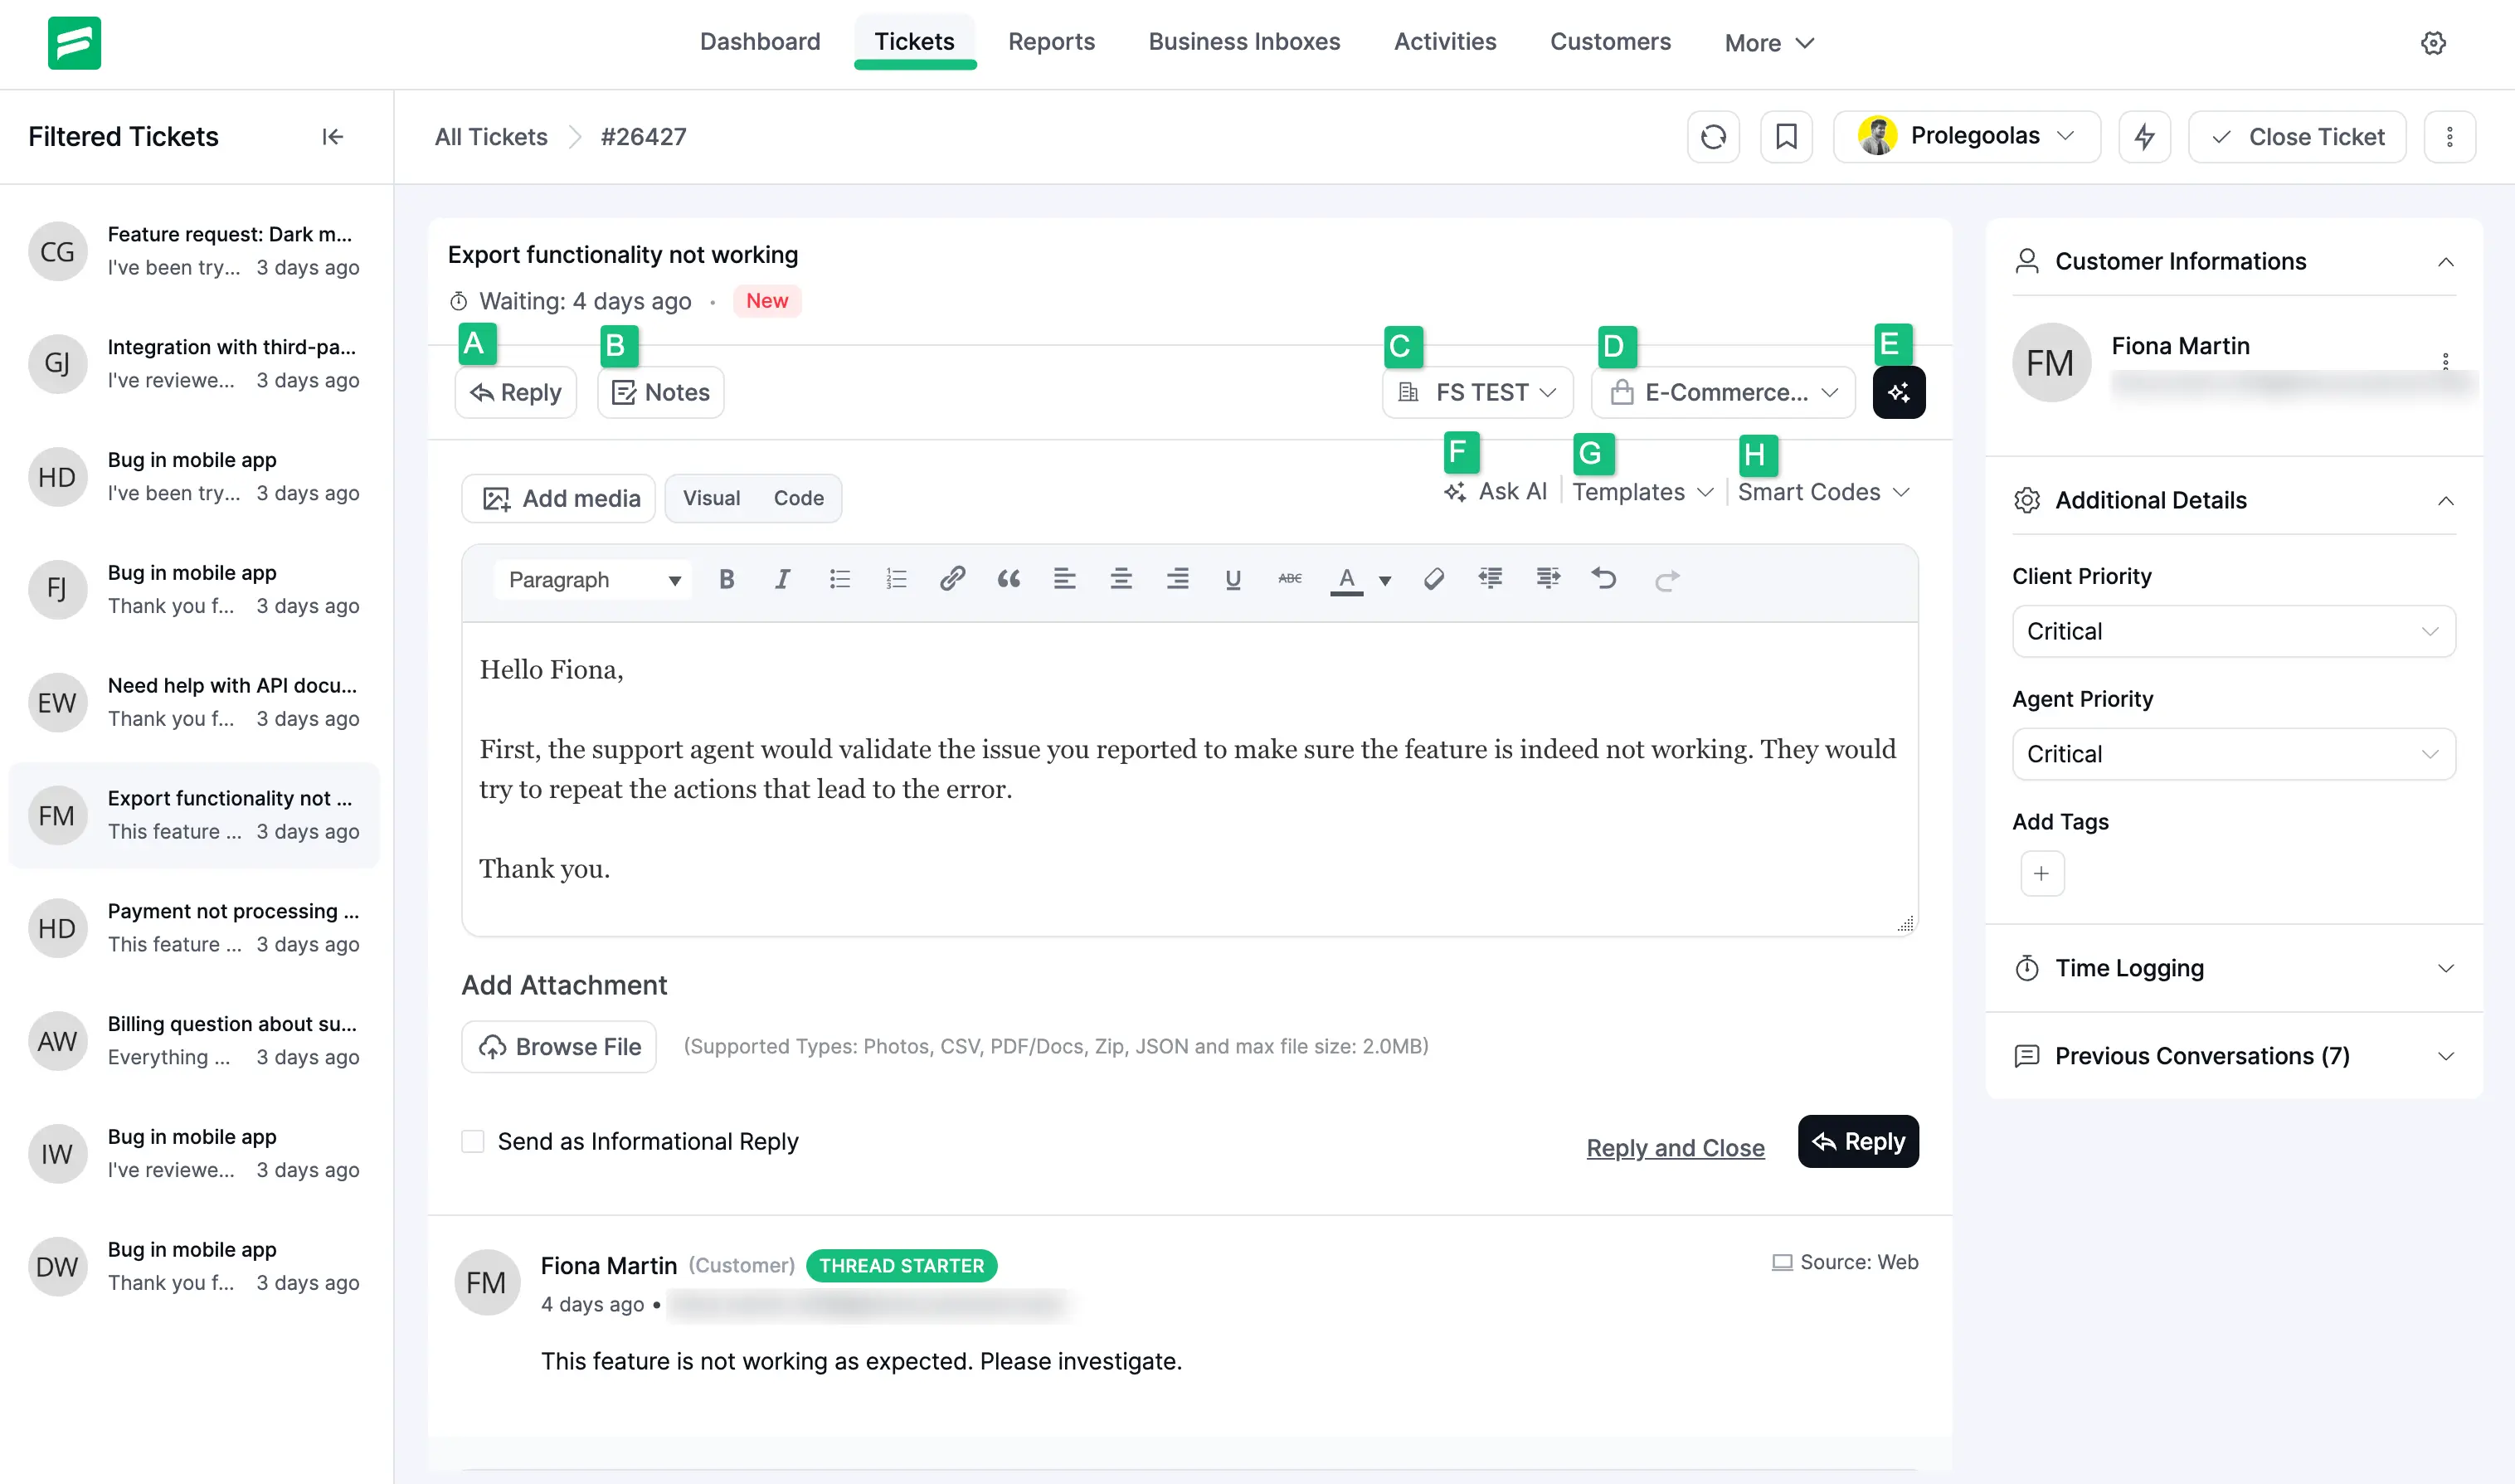
Core Response Tools
- A) Reply: Opens the text editor to respond to the customer. You can format text (bold, italic), add links, and use the Add Media button to upload files.
- B) Notes: Allows agents to leave internal comments that are invisible to the customer. This is ideal for team collaboration and private context.
- Send as Informational Reply: Use this to provide updates without changing the ticket's "Waiting" status.
- Reply and Close: A single action to send your response and immediately resolve the ticket.
- C) Business Inbox: Shows and allows you to sort by the specific business brand associated with the ticket.
- D) Product/Service: Displays the specific product or service the customer is inquiring about.
- E) AI Assistant: Provides options to summarize long conversations and analyze customer satisfaction.
- F) Ask AI: Utilize artificial intelligence to draft responses based on the ticket context.
- G) Templates: Insert pre-written responses (Saved Replies) to common questions.
- H) Smart Codes: Insert dynamic data, such as the customer's name or ticket ID, directly into your reply.
- I) Refresh Button: This “Refresh” lets you update ticket entries with the latest information.
- J) Add Bookmark: This is the button for bookmarking the tickets.
- K) Agent Selection: Use the dropdown menu to reassign the ticket to a different support staff member.
- L) Automatic Workflow: Manually trigger pre-configured automation sequences for the ticket.
- M) Close Ticket: This is the button for closing your ticket.
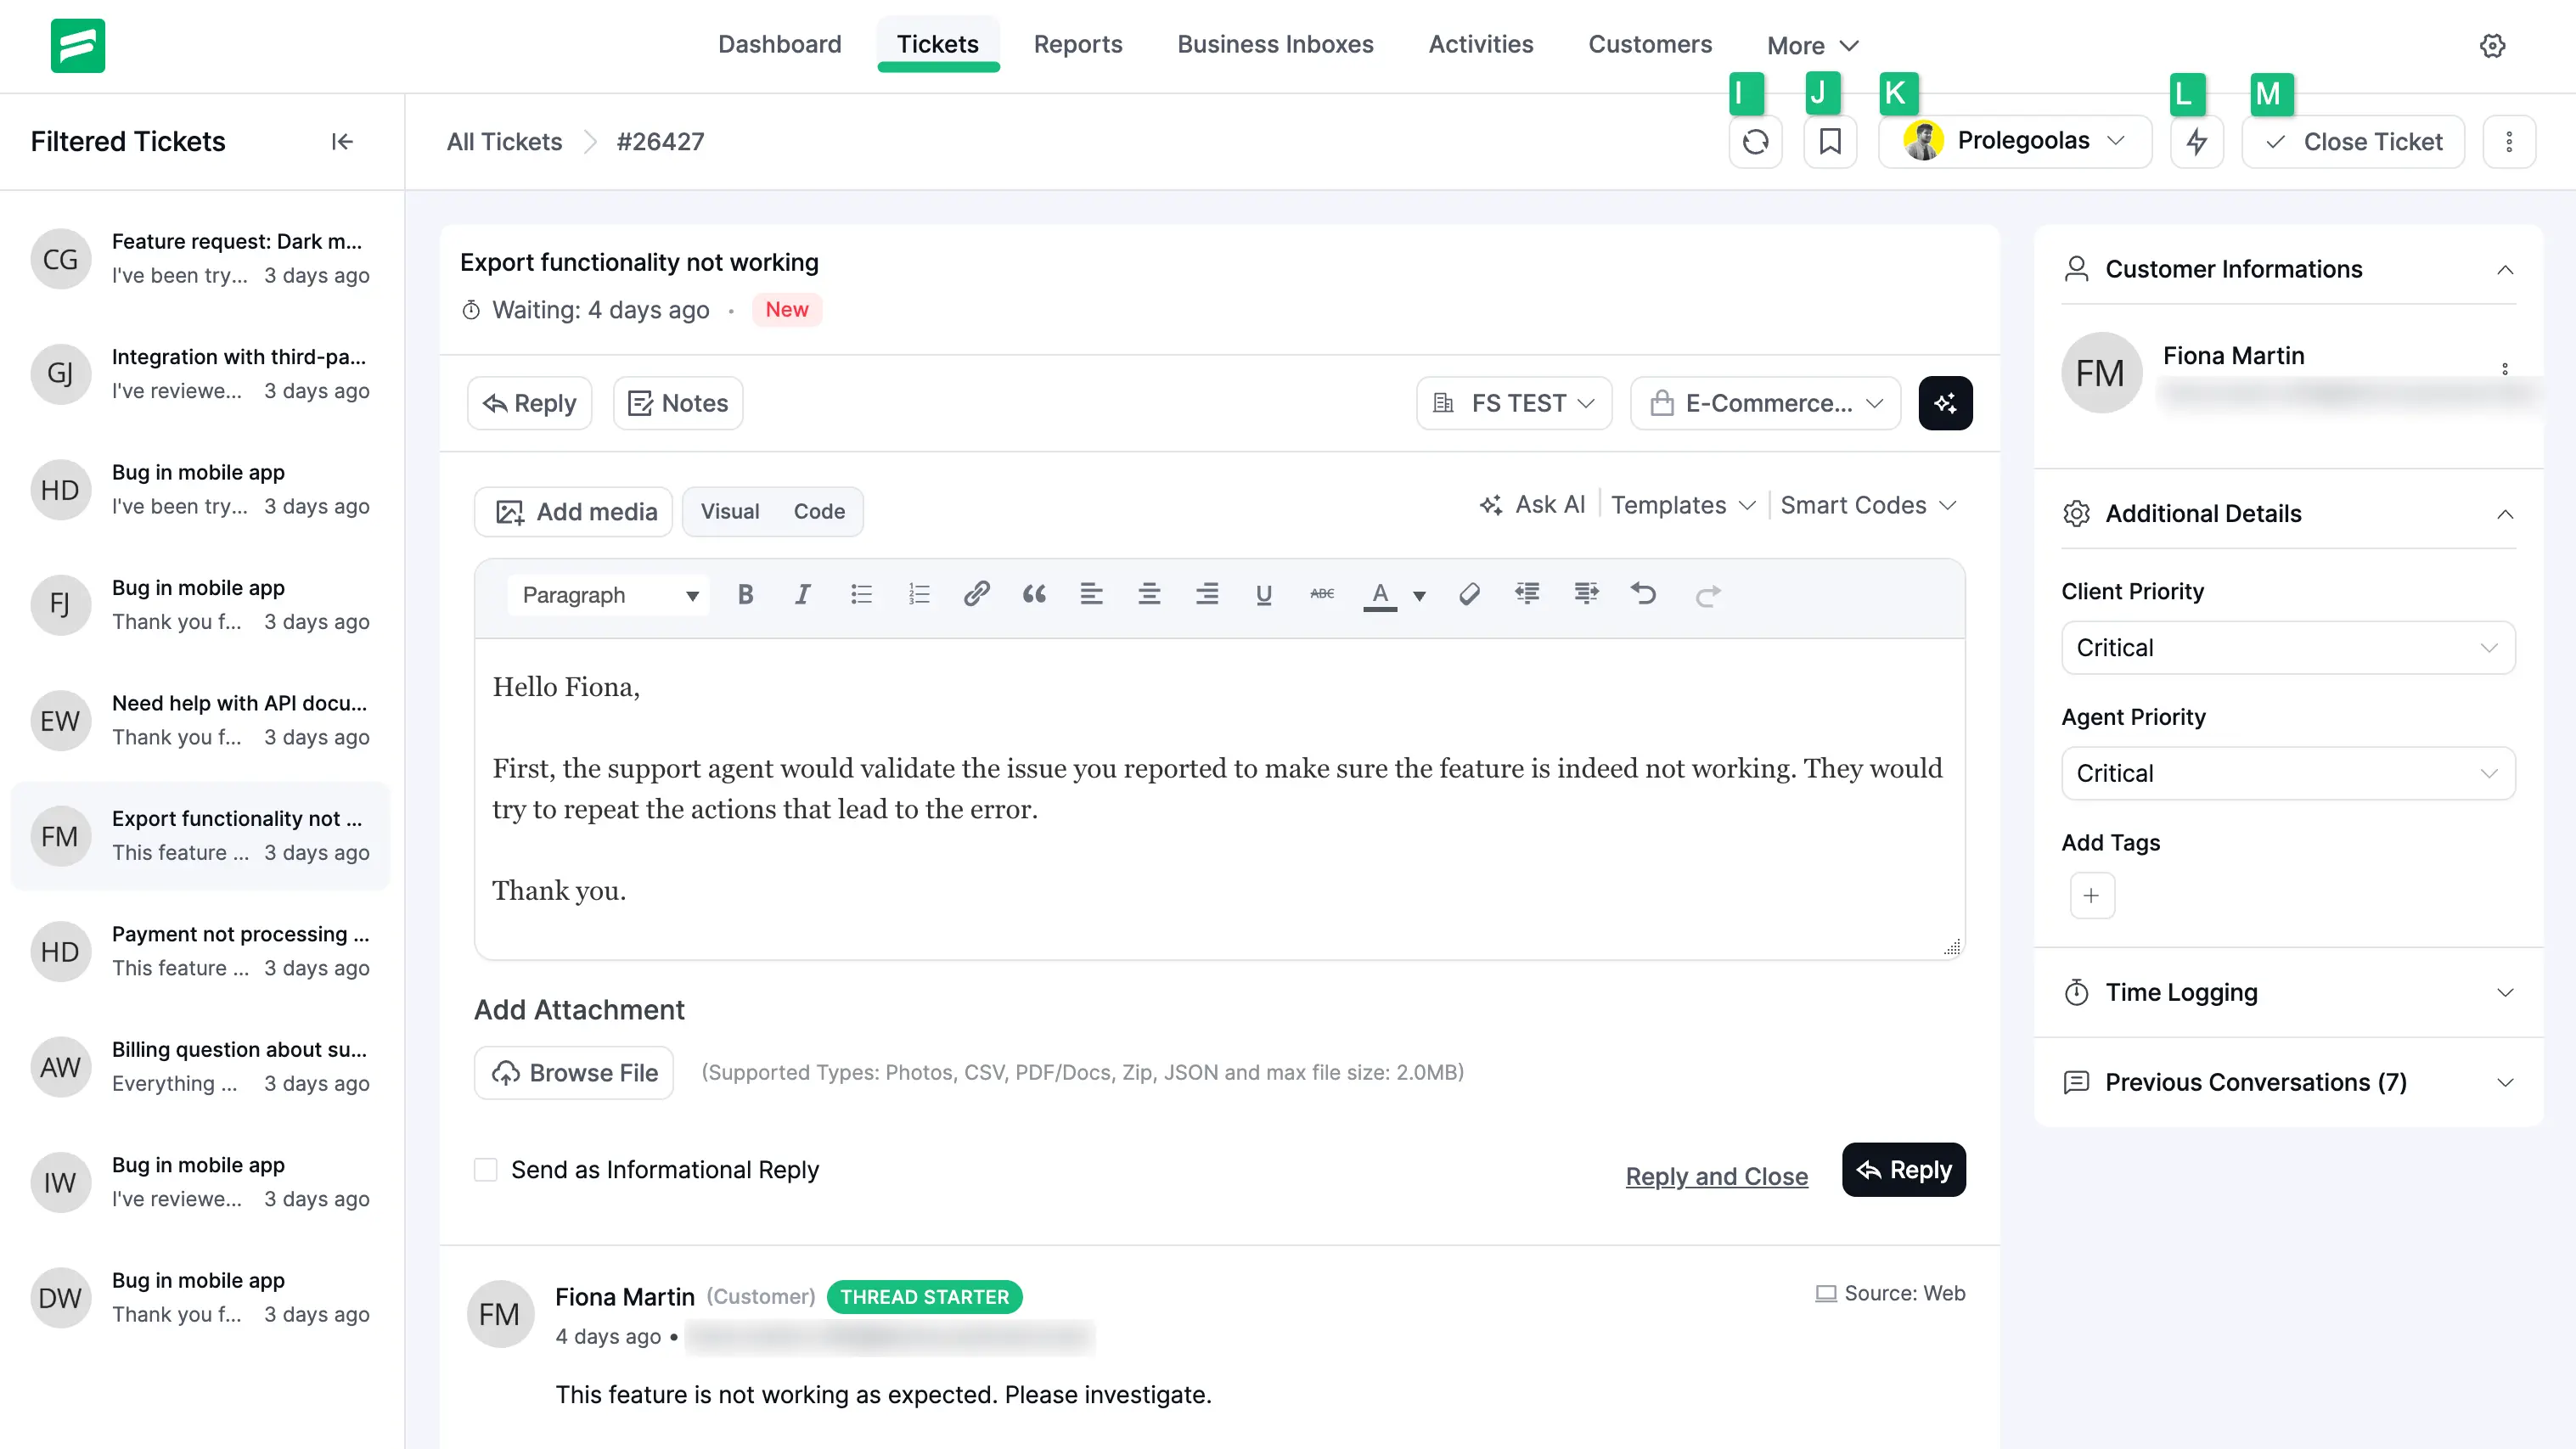
Customer Information & Additional Details
The right sidebar provides a 360-degree view of the customer and the ticket's priority level.
- Customer Information: View the customer's name, email, and profile details. You can also edit or block the profile using the options menu (three dots).
- Additional Details:
- Client Priority: The priority level set by the customer during submission.
- Agent Priority: The priority level assigned by the support staff.
- Add Tags: Apply custom labels for better ticket organization and filtering.
- Integration Data: View data from connected apps like WooCommerce (purchase history), LMS platforms (enrollment status), or FluentCRM.
- Previous Conversations: A list of the customer's past support history to provide full context for the current issue.