Appearance
Customer Support Portal Dashboard
The Customer Portal is intended for direct use by end-users where users can view & use the dashboard to submit tickets. This article will guide you through how the Customer Portal of Fluent Support can be used with all the available options.
Customer Portal
To learn how you can use the customer portal with the help of its all available options, follow the steps with the screenshots below –
First, sign up or log in to the customer support portal and the Customer Portal Dashboard will open with all available options.
NOTE
Remember, for sign-up, use a valid email as a verification code will be sent to the user email for confirmation, ensuring only valid emails can be used for sign-in.
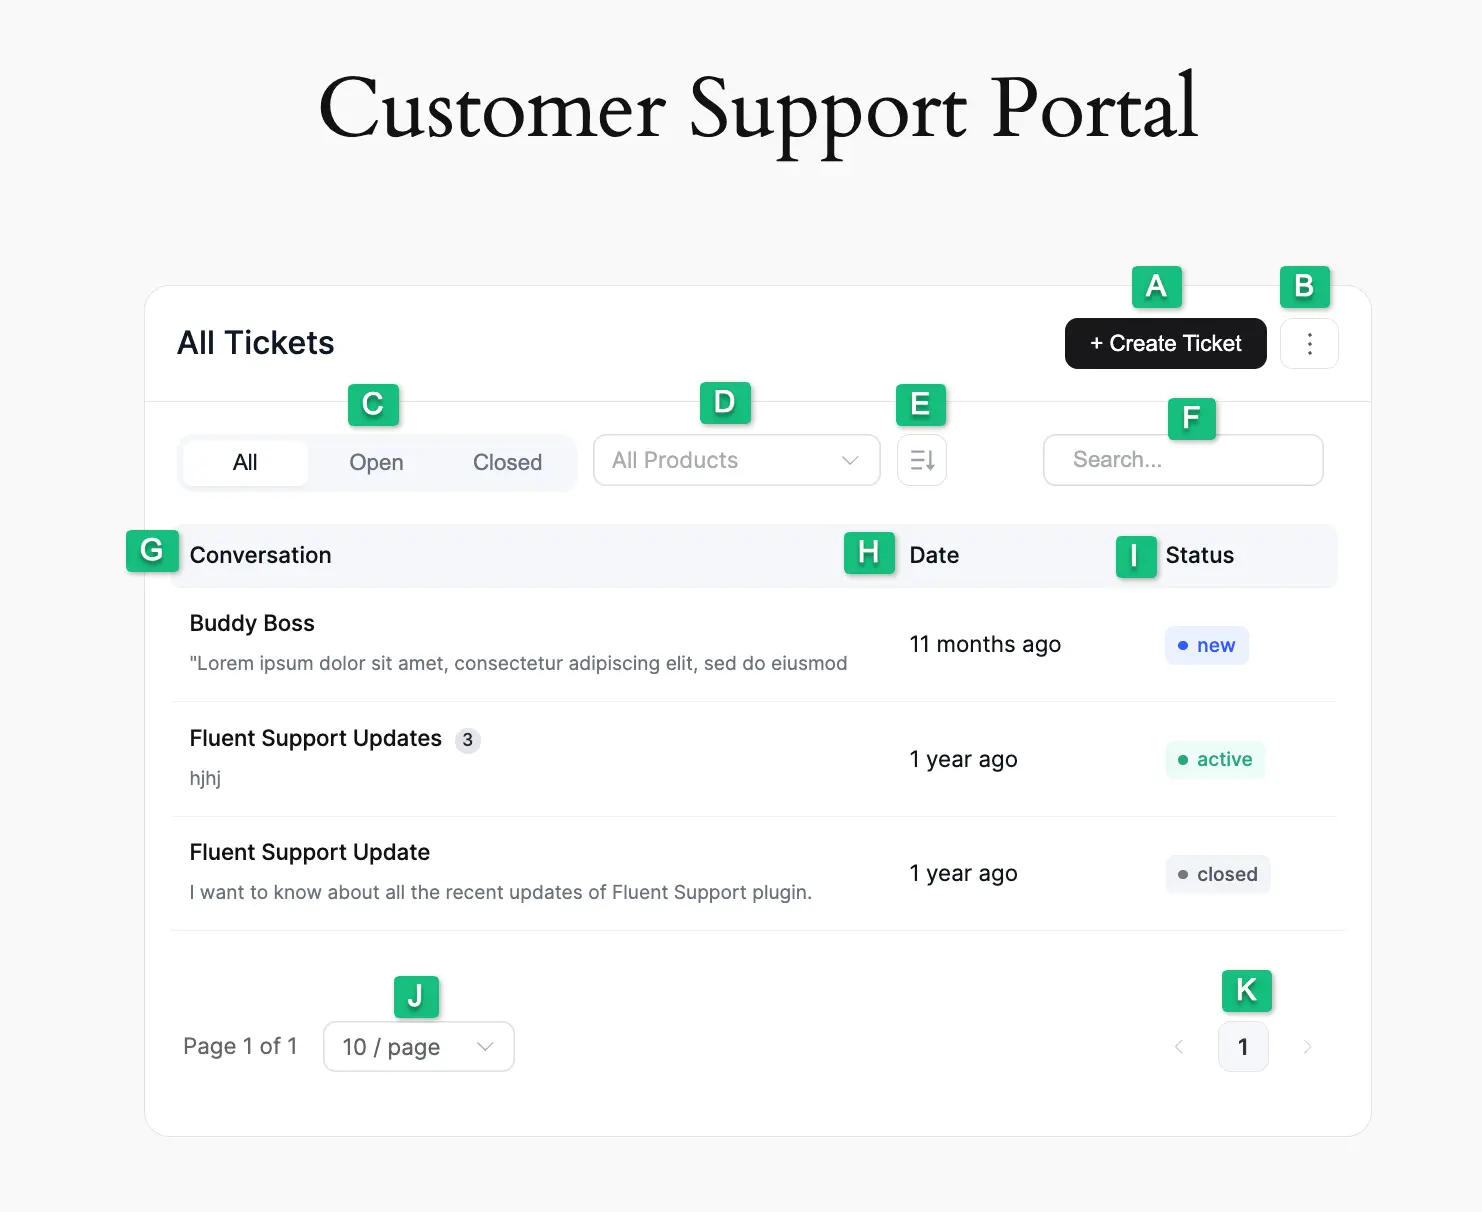
All the options of the Customer Portal Dashboard are explained below:
A. Create Ticket : Using this button, users can create and submit as many support tickets as they want.
B. Logout : Using this button, users can logout from their customer support portal dashboard at any time. Remember , you can get the logout option, in two different ways. These are:
Use Gutenberg Block : To get the logout option, you need to add the Customer Support Portal to your WordPress Site (desired page/post) using the Gutenberg Block. To learn how to add a Customer Portal using Gutenberg Bloc k, read this Documentation.
Use Shortcode : The second way to get the logout option in the Customer Portal Dashboard is to add the following Shortcode to your WordPress Site (desired page/post). To learn more details about adding a Customer Portal using Shortcode , read this Documentation.
[fluent_support_portal show_logout = yes]
C.Status Filter : Using this, users can filter which tickets they want to see in their dashboard based based on the available ticket stauses (e.g., All , Opened, or Closed tickets).
D. Product Filter : Using this dropdown option, users can filter their tickets based on the available Products.
E. Tickets Sorting : With this, users can Sort their tickets in Ascending or Descending order based on Ticket ID , Title , & Created At options.
F. Search Bar : Using this search bar, users can search for any of their desired tickets by putting its title in the box.
G. Conversation : Under this column, all tickets will be listed.
H. Date : Under this column, users can see the opening time of their tickets.
I. Status : Inside this column, users can see the ticket statuses (e.g., New , Active, and Closed) for each ticket.
J: Tickets Display Dropdown : Using the option, users can define per page how many tickets they want to see.
K: Pagination : Using this arrow option, users can scroll to different pages.